Cycle counts
Supply Chain · Inventory
Cycle counts
For most companies, warehouse stock only needs to be counted once a year. To comply with that standard, the Inventory app defaults to the scheduled date of the 31st of December of the current year.
However, for some businesses, maintaining an accurate inventory count is crucial. These companies use cycle counts to maintain accurate stock levels. Cycle counting is a method by which companies count their inventory more often in certain locations to ensure that their physical inventory counts match their inventory records.
Configuration
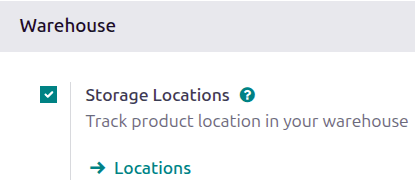
In Odoo, cycle counts are performed by location. Therefore, the Storage Locations feature needs to be enabled before performing a cycle count.
To enable this feature, navigate to and scroll down to the Warehouse section. Then, select the checkbox next to Storage Locations and click Save.
Counting inventory at a set frequency
Once the Storage Locations feature is enabled and locations are created in the warehouse, the inventory count frequency can be changed for specific locations, and counts can be conducted on those locations.
Setting a cycle count frequency
To view and edit locations, navigate to . This opens a Locations page containing every location currently created in the warehouse.
From this page, click a location to open its form.
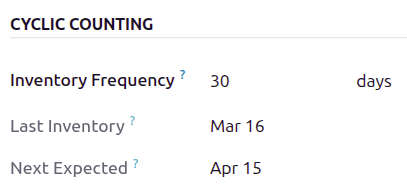
Under the Cyclic Counting section, locate the Inventory Frequency field, which is set
to 0 by default (if this location has not been edited previously). In this field, change the value
to any number of days desired for the frequency of counts.
Example
A location that needs an inventory count every 30 days should have the Inventory
Frequency value set to 30.
Now, to ensure the scheduled cycle count appears as expected, perform the first cycle count. After inventory adjustments have been applied to products in this location, the next scheduled count date is automatically set based on the value entered in the Inventory Frequency field.
Performing a cycle count
To perform a cycle count for a specific location in the warehouse, navigate to the . This opens a Physical Inventory page that lists all products currently in stock, with each product on its own line. Use this page to perform inventory adjustments.
From this page, the Filters and Group By options (accessible by clicking into the Search bar) can be used to select specific locations and perform inventory counts.
To select a specific location and view all products within it, click into the Search bar. Then, in the Group By column, select Location.
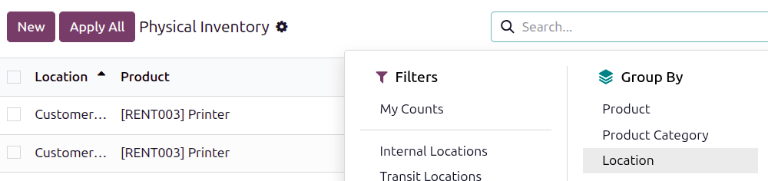
All products are sorted by storage location on the Physical Inventory page, and a cycle count can be performed for all products in that location.
Tip
In large warehouses with multiple locations and a high volume of products, it might be easier to search for the desired location. To do this, from the Physical Inventory page, click into the Search bar.
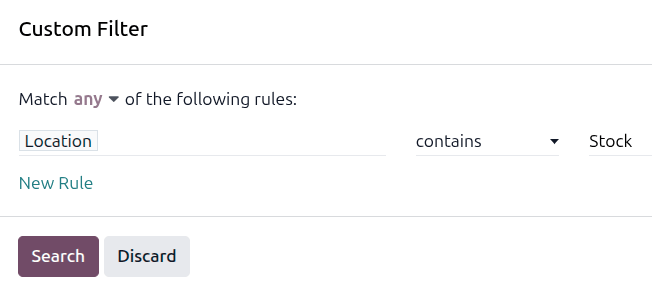
Then, in the Filters column, click Custom Filter to open a Custom Filter pop-up window.
In the first field, click the value and select Location from the list of options. Select contains in the second field. In the third field, type in the name of the location being searched for.
Click Search for that location to appear on the page.
Note
When performing counts in the Barcode app, inventory adjustments are grouped by location by default.
Change full inventory count date
While cycle counts are typically performed at the location level, companies should conduct a full inventory count once per year. In addition to keeping stock counts accurate, full inventory counts ensure that accounting earnings and costs are recorded accurately. The scheduled date for full inventory counts of all in-stock products in the warehouse can be manually changed to an earlier date than the listed date.
To modify the default scheduled date, go to the . Then, in the Operations section, locate the Annual Inventory Day and Month
setting, which defaults to 31 December.
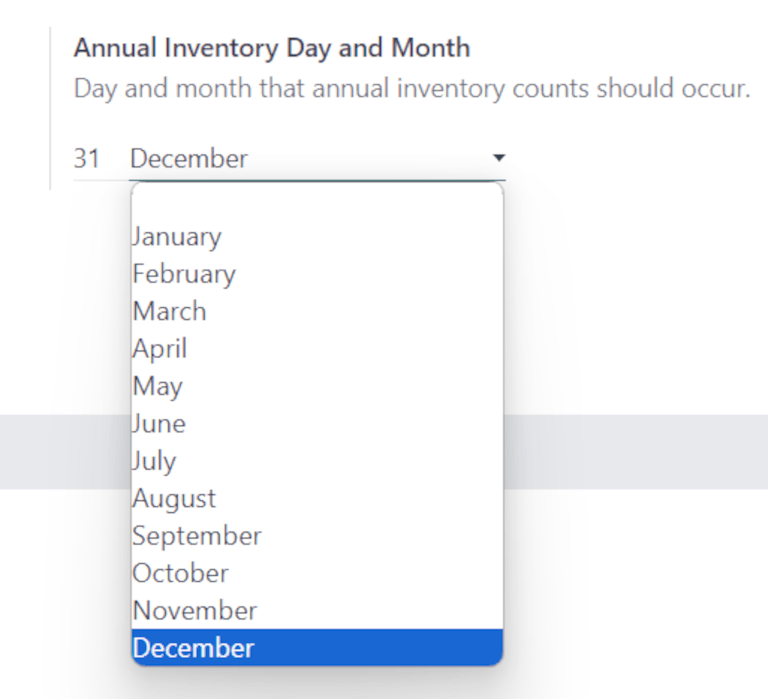
To change the day, click the 31 and select a day within the range 1-31, depending on the desired
month of the year.
Then, to change the month, click December to open the drop-down menu and select the desired month.
Important
Confirm the date entry reflects a valid calendar date.
After all necessary changes have been made, click Save.
See also
Adapted from the Odoo 19.0 User Documentation for DigitsCode customer support. © Odoo S.A. DigitsCode capabilities remain in the DigitsCode Capabilities category.