Dispatch management system
Supply Chain · Inventory
Dispatch management system
The dispatch management system feature in Odoo is used to plan and build shipments. Key features include:
Load building: Group products for specific carriers, assign those batches to loading docks, and manage vehicle assignments based on fleet capacity. This ensures the right products are packed into the appropriate trucks for delivery.
Fleet management: Track and manage the capacity of in-house delivery vehicles.
Configuration
To use the dispatch management system, the following setup must be completed:
Install the Fleet application.
Enable necessary features in the Inventory app.
Enable and configure the Mapbox integration.
Configure vehicle capacity (volume and weight).
Enter vehicle car models.
Set up vehicles as delivery methods.
Create dock locations.
Important
Dispatch management can evaluate capacity on a vehicle only if a weight and volume are assigned to a product on the Inventory tab of its product form.
Inventory settings
To set the required inventory settings, navigate to .
In the Operations section, select the Batch, Wave & Cluster Transfers checkbox to prepare batches of orders for delivery.
In the Shipping section, select the Delivery Methods and Dispatch Management System checkboxes. Doing so allows specific vehicles to be set as carriers.
In the Warehouse section, select the Storage Locations checkbox to assign specific locations in the warehouse as loading zones for delivery trucks.
Then, once all the configurations are complete, be sure to click Save.
Mapbox integration
Next, configure the Mapbox integration.
First, create a Mapbox account. If you already have a MapBox account, log in. Upon login, the Account overview page displays.
Then, create an access token.
After the token is created, copy it to the clipboard.
Important
If you have created a secret token, Mapbox does not display secret tokens again after leaving the Access tokens page. Make a copy of this token now.
See also
How to use Mapbox securely: Access tokens
URL restrictions
In Odoo, navigate to the app. In the Integrations section, locate the Map Routes setting. Paste the token in the Token field.
Be sure to click Save to save the settings.
Vehicle capacity
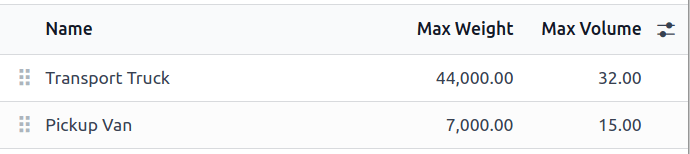
To configure the vehicle capacity, go to .
Next, click New to add a new category, or click into an existing category to modify it.
In the Name field, enter the type of vehicle (e.g., Pick-up truck, Van, or Cargo
truck). Then, enter the vehicle capacity in the Max Weight (in kilograms) and
Max Volume (in cubic meters) fields.
Note
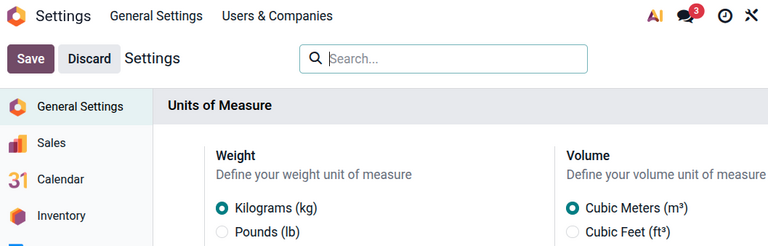
The units of measurement for vehicle capacity are assigned at the global level in the Settings app, in the Units of Measure section.
See also
Car model
Configuring a vehicle’s car model is required when adding vehicles in Odoo. Ensure the correct Category is selected for a car model. Doing so automatically applies weight and volume capacities to all vehicles of that type.
To configure, navigate to .
From the Models list, select an existing model, or click New in the top-left corner to create a new model. Then, set the relevant Category field to the relevant vehicle category.
See also
Delivery method
Optionally, delivery vehicles can be assigned as a delivery method carrier.
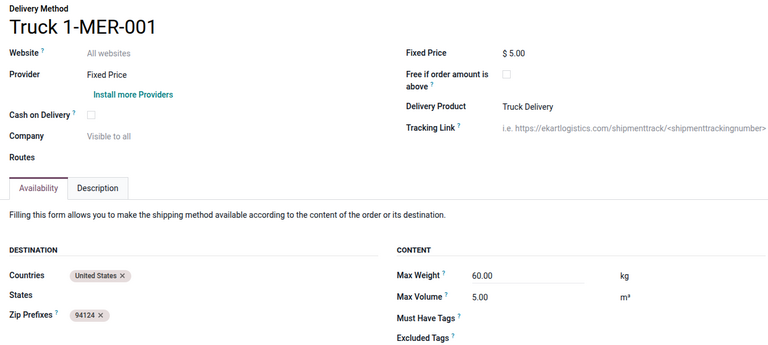
To configure delivery methods, go to . Select an existing delivery method, or click New.
See also
On the Delivery Method form, enter a name for the delivery method. It is recommended to
use identifying information, such as the vehicle description and license plate number (e.g. Truck
123-ABCD).
Since the delivery methods are managed internally, set the Provider to either Fixed Price or Based on Rules. For more information about how shipping prices are calculated, refer to the Delivery method article.
Next, set a Delivery Product, which is the product that shows up as the customer’s delivery charge on the sales order or invoice.
Optionally, in the Availability tab, set the Countries, States, or Zip Prefixes to limit the range of local delivery.
Dock locations
Each loading dock must have a dedicated location. To create dock locations, go to and click New.
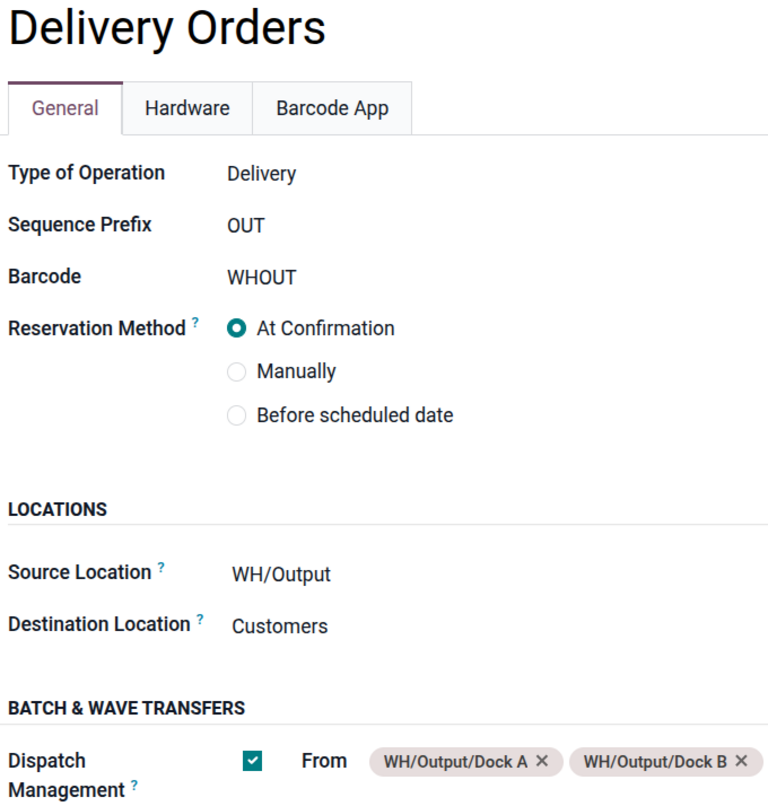
After dock locations are set up in Odoo, configure them in the operation type. Navigate to and open an existing delivery operation type, or click New to create a new one.
After defining the other fields in the operation type form, scroll to the Batch & wave transfers section and select the Dispatch Management checkbox. The Dock locations field appears. Define the dock locations for this operation type.
See also
Build loads
After setup is complete, optionally assign orders to a carrier and group them into batches. Then, configure the batch form, as needed.
To group products, go to the , which reveals a list of outgoing deliveries.
See also
Because this article is about a specific use case, explore details about each picking method in their dedicated articles.
Carrier assignment
Reveal the Carrier column, if it is not visible by default, by clicking the (settings) icon in the top-right corner, and selecting the Carrier checkbox.
Tip
Other useful columns to enable can be Zip code, Shipping Weight, and Shipping Volume.
Select the delivery orders for the batch by selecting the checkboxes on the left. Next, click into the line’s Carrier fields. In the resulting drop-down menu, choose the desired vehicle’s delivery method. A Confirmation pop-up window appears, indicating the number of orders being added to the batch. Click Confirm, and the carrier is updated for all the selected records.
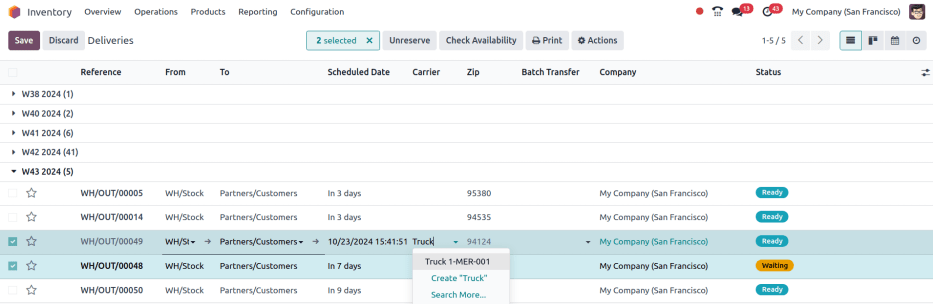
The delivery method Truck 1-MER-001 is set as the Carrier for two delivery orders.
Create batch
With the carrier set, begin adding orders to a batch or wave transfer by ticking the checkbox.
Note
If a delivery order is already assigned to a batch transfer, assigning a batch transfer here does not update it.
Then, click the Actions button, and click either Add to batch or Add to wave. In the pop-up window, ensure Add to is set to a new [batch/wave] transfer, then click Confirm.
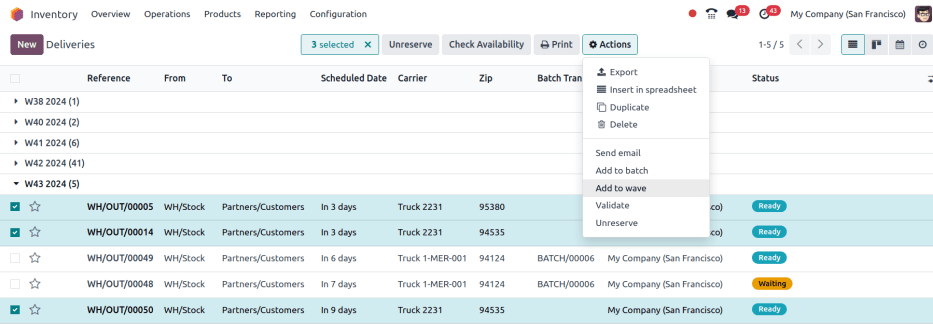
Delivery orders are selected to be grouped into a wave transfer.
Alternative batch creation method
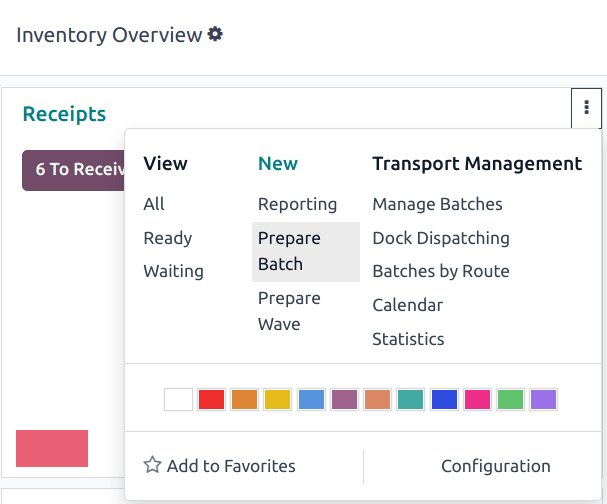
Another place to create batches is by going to the app, and in the Delivery Orders card, click the (vertical ellipsis) icon. In the resulting drop-down menu, click Prepare batch.
Note
The Transport Management drop-down menu contains other tools for fleet management:
Manage Batches: open list of batches
Dock Dispatching: open weekly calendar view of scheduled batch operations
Batches by Route: Kanban view of batches grouped by fulfillment route
Calendar: open hourly calendar view of scheduled operations
Statistics: open pivot table of the batch transfers
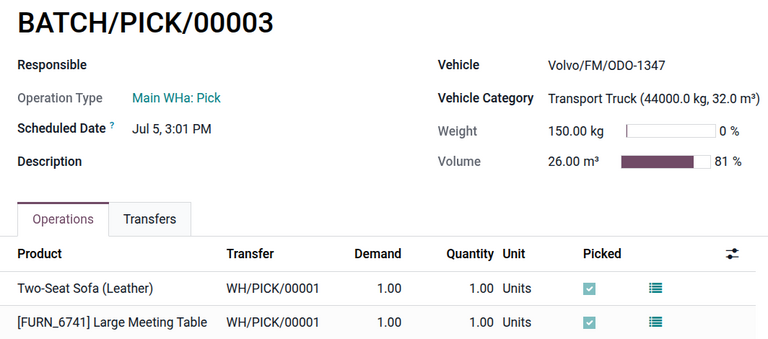
Batch form
On the batch transfer form, fill the following fields out accordingly:
Responsible: Assign an employee to the picking. Leave blank if any worker can fulfill this picking.
Operation Type: From the drop-down menu, select the operation type under which the picking is categorized.
Scheduled Date: Specify the date by which the Responsible person should complete the transfer to the output location.
Dock Location: Select the loading location.
Vehicle: Select the vehicle, which will auto-fill the Vehicle Category.
Vehicle Category: Determine if the order exceeds the vehicle’s capacity limits
Example
The Volume bar indicates that the transport truck is nearing capacity.
Prepare delivery route
To help the driver prepare, click the Map button at the top of the batch or wave form to view delivery destinations on a map. Selecting an individual delivery order pinpoints its location.
Note
The Map button is only visible for transfers with the In progress status.
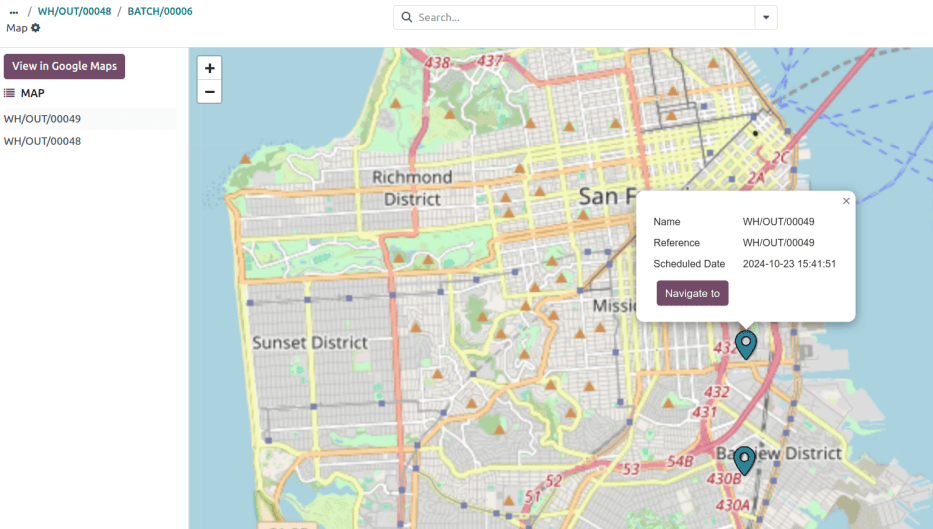
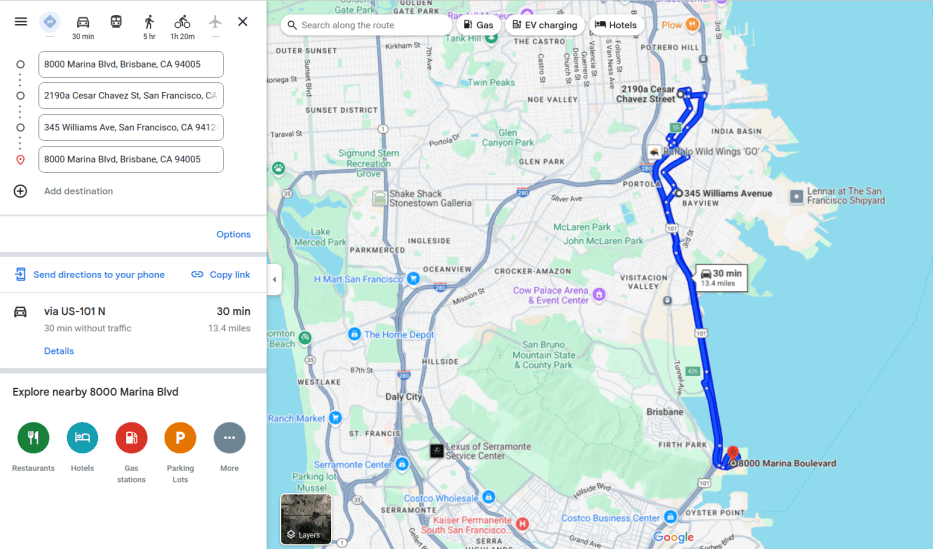
Additionally, use the View in Google Maps button to generate a route from the warehouse to the delivery points.
Adapted from the Odoo 19.0 User Documentation for DigitsCode customer support. © Odoo S.A. DigitsCode capabilities remain in the DigitsCode Capabilities category.