Reception report
Supply Chain · Inventory
Reception report
In Odoo Inventory, users can use reception reports to allocate incoming stock from purchase orders (POs) to one or more sales orders (SOs). This allows users to directly assign units of the replenished stock to fulfill higher-priority orders or retain more control over their inventory reservations.
Configuration
To use reception reports, enable the Reception Report feature by navigating to . Under the Operations section, select the checkbox next to Reception Report, then click Save.
Workflow
Reception reports are used to manage the allocation of replenished stock. This means that users must first confirm customer demand, then replenish the necessary stock through a PO. Only after confirming this replenishment order can users access the reception report and reserve units from the PO to fulfill specific customer orders.
Important
SOs with products that can be fulfilled with existing on-hand stock do not appear in reception reports.
The following process outlines all necessary steps for allocating stock using reception reports:
Confirm SOs for one or more customers.
Create and confirm a PO for the demanded products.
Open receipt and access the reception report to allocate products.
Validate receipt on the PO.
Validate delivery on the SO.
Create and confirm SOs
When using reception reports, a user begins by creating sales quotations for one or more customers’ requested Product and Quantity. Confirm the quotations, turning them into SOs. This generates a delivery order for each SO, accessible via the Delivery smart button.
Create and confirm PO
The user then creates a new RfQ to replenish the demanded stock by navigating to the Purchase app and clicking New. On the form, add the products in demand on the customers’ SOs by clicking Add a product in the Products tab and specifying the required Quantity.
Important
To ensure Odoo can properly create allocations, confirm that the selected product has the Can be Purchased option selected and its Product Type set to Storable Product.
After adding the products, click Confirm Order to turn the RfQ into a PO.
Reception report
After confirming the PO, open the reception report to allocate the products’ units to the desired SOs. To do so, click the Receipt smart button at the top of the PO to open the receipt for the incoming stock of the product.
Tip
Alternatively, navigate to the Inventory app and click (#) To Process in the Receipts card. Then, select the appropriate receipt.
On the receipt, an Allocations smart button appears at the top, which opens the Reception Report page.
The Reception Report page displays a list of products to which the units on this PO can be allocated, grouped by the SOs on which they appear. A link to each SO is included, along with its Expected Delivery, and an option to assign all units of its products. Under each SO is a list of its products, including each product’s name, quantity, and the option to assign the specified units individually.
Note
SOs in the reception report are listed in order by the recency of their associated delivery (i.e., the SO with the oldest delivery order appears first). In other words, SOs are ordered by how recently they were confirmed, with the oldest confirmed SO appearing first.
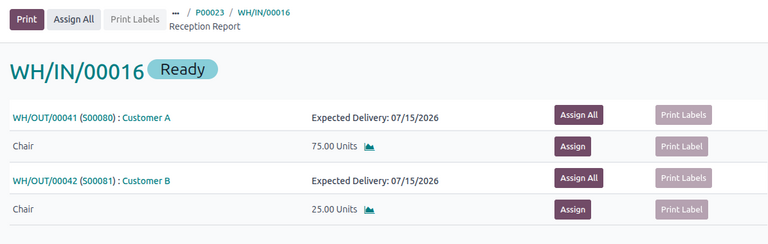
Allocate units
To allocate units for a product in an SO, click Assign in the product’s corresponding row. To undo allocation, click Unassign.
Alternatively, to allocate all available units for all products in an SO, click Assign All in the corresponding row of the SO. To assign all available units across all SOs, click Assign All at the top.
The quantity of reservable units for each product is automatically calculated in order, starting from the oldest SO. This allows users to allocate as many units as available on the PO to fulfill the quantity specified on the SO.
Example
For example, SO A demands five Chairs and SO B demands five Chairs. A PO for eight units is created. On the reception report, SO A is listed first with five reservable units. The remaining three available units from this PO can be assigned to SO B, which will create a backorder due to insufficient supply.
SOs with allocated units are automatically linked to the PO. Users can access this PO directly from the SO via the Purchase smart button. Similarly, the linked SO can also be accessed from the PO via the Sale smart button.
Validate receipt
After allocating the desired units, receive the incoming stock. To do so, navigate to the PO and click Receive Products or the Receipt to open the receipt. Then, click Validate to receive the products into stock.
Validate delivery
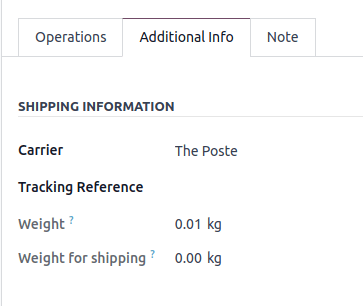
After receiving the incoming stock, fulfill the delivery order for the customer’s SO. To do so, navigate to the SO, then click Delivery to open the delivery order. Note that the Operations tab is populated with a new line showing the allocated Product and its allocated Quantity.
Finally, click Validate to confirm that the products have been delivered to the customer.
Example
The following example demonstrates how a reception report is used to allocate stock for a customer SO of higher priority.
Two SOs are created for separate customers. Customer A orders 75 units of a Chair. Customer B also orders 75 units of the same product but needs them as soon as possible.
No stock exists for the Chair, so the user creates and confirms a PO to replenish the product from Vendor A. This vendor can only provide 100 units of the Chair this week. So, the user creates and confirms another PO to replenish the remaining 50 units from Vendor B, which will be available next week.
After confirming the POs, the user opens the reception reports for each vendor’s receipt. Vendor A’s report lists the SO for Customer A with 75 reservable units, then Customer B’s SO with 25 reservable units. Vendor B’s report lists the SO for Customer A with 50 reservable units.
Because the user wants to prioritize Customer B’s order, they want to ensure Customer B receives 75 units from Vendor A, which can guarantee faster delivery. To do so, they first open Vendor B’s reception report and assign 50 units to Customer A’s SO. Odoo then recalculates Vendor A’s reception report, updating Customer A’s previous quantity of 75 units to 25 units and Customer B’s quantity to 75 units.
The user can now assign all 75 units from Vendor A to fulfill Customer B’s delivery.
Print labels
Users can print labels for allocated products to ensure that they are correctly designated to the appropriate customer.
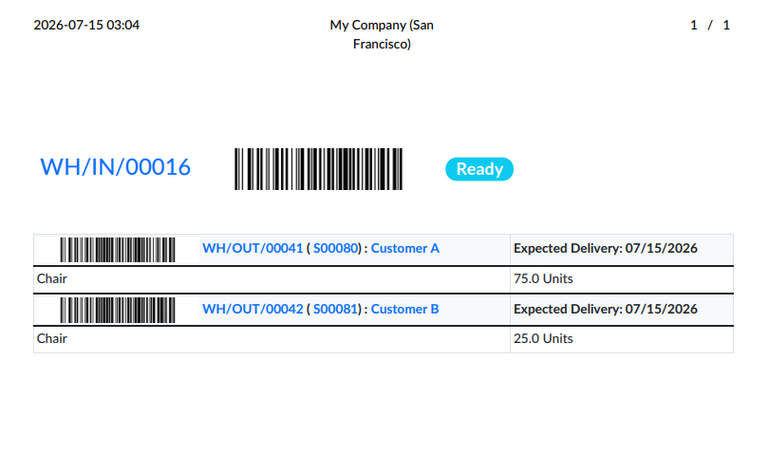
After allocating the desired units, click Print at the top to download a PDF of the reception report for the allocated units. The report includes a scannable barcode at the top for the receipt order. Additional barcodes are also included for any delivery orders with allocated units.
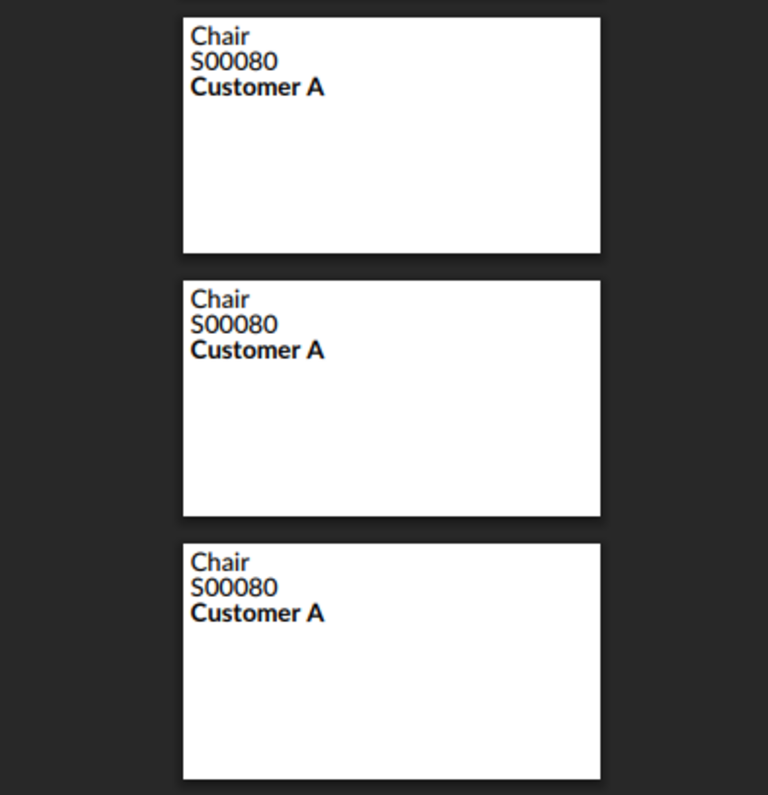
If products are allocated, users can also click Print Labels to print an individual label for each unit of the allocated products. Each label displays the name of the product, its associated SO number, and its customer.
Adapted from the Odoo 19.0 User Documentation for DigitsCode customer support. © Odoo S.A. DigitsCode capabilities remain in the DigitsCode Capabilities category.