eLearning
The eLearning app allows you to easily upload content, define learning objectives, manage
attendees, assess students’ progress, and even set up rewards. Engaging participants in a meaningful
learning experience enhances their attentiveness and fosters heightened productivity.
Important
You can manage your eLearning content on the front end or the back end. The front end
allows you to create content quickly from your website, while the back end provides
additional options and allows collaboration. This documentation focuses on using the back end to
create your content.
Courses
To get an overview of all courses, go to .
Click on a course card to edit the course on the back end. Click View course to access
the course on the front end.
Course creation
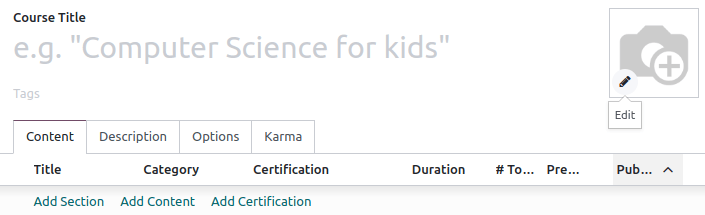
Click New to create a new course. In the form that opens, add a Course Title
and one or more Tags to categorize the course and allow users
to filter courses based on their tags.
To add an image to illustrate the course, hover your mouse on the camera placeholder image and
click on (Edit).
Four tabs allow you to edit your course further: Content,
Description, Options, and
Karma.
Content tab
This tab allows you to manage the course content. Click Add Section to divide the
course into different sections. Click Add Content to create content items. Click Add Certification to assess the attendees’ level of
understanding, certify their skills, and motivate them. Certification is part of the
Surveys app.
Description tab
You can add a short description or information related to the course in the Description
tab. It appears under the course title on your website.

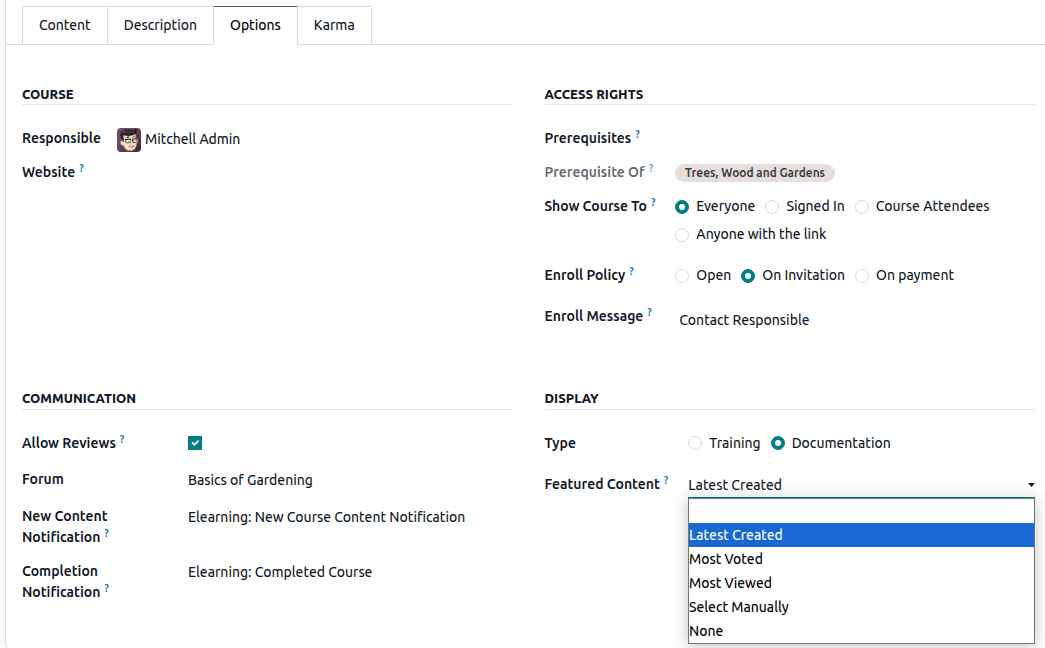
Course
Assign a Responsible user for the course. If you have multiple websites, use the
Website field to display the course only on the selected website.
Access rights
Prerequisites: Set one or more other courses that users are advised to complete before
accessing the course.
Prerequisite Of: If the course has been defined as a prerequisite for one or more
courses, this read-only field displays the course name(s).
Show course to: Define who can see the course on your website. Select one of the
following:
Everyone: The course is publicly visible.
Signed In: The course is only visible to users who are logged in.
Course Attendees: The course is only visible to users who are already enrolled in
the course.
Anyone with the link: The course can only be accessed via a direct link.
Enroll Policy: Define how people can enroll in the course. The choice of policy also
determines which internal eLearning users can add, i.e., manually enroll, attendees via the
Add attendees button or invite attendees to enroll via the Invite button.
Note
Internal eLearning users have either Officer or Manager access rights.
Select one of the following:
Open:
On invitation:
Only people who have received an invitation can enroll in the course.
If the course visibility is set to Everyone, Signed In, or
Anyone with the link, any non-invited person who logs in can request access to the
course via the course page. Enter an Enroll Message to explain how to enroll,
e.g., “Contact Responsible”.
Tip
The request creates a to-do assigned to the course’s Responsible user, allowing
them to Grant Access or Refuse Access. The to-do is visible to the
Responsible user and any eLearning Manager in the course’s chatter, and the
Responsible user is notified via email. Either the Responsible user
or an eLearning Manager can grant access, in which case the requestor is automatically
enrolled in the course, or refuse access.
Only the Responsible user for the course or an eLearning Manager can add or invite
internal or external attendees.
On payment:
This option is only shown if the Paid courses feature is enabled in the
eLearning settings.
Anyone who can see the course can enroll in the course upon payment.
Any eLearning Officer can invite internal or external attendees to enroll in the course.
Only the Responsible user for the course or an eLearning Manager can add
attendees. Payment is not required when an attendee is added in this way.
To set a course as On payment, a Product must be selected; only
products set up with Course as their Product Type are available for
selection.
Tip
To add or invite an attendee, the attendee must be an existing contact or created as a new
contact. A person who creates a customer account on your website is automatically a contact.
Communication
Allow Reviews: Enable this option to allow attendees to like, comment on, and submit
reviews for the course content.
Forum: Add a dedicated forum to the course. This option is only shown if the
Forum feature is enabled in the eLearning settings.
New Content Notification: Select an email template to send emails to attendees when
you upload new content items. Click on Internal link to access
the email template editor.
Completion Notification: Select an email template to send emails to attendees once
they reach the end of the course. Click on Internal link to
access the email template editor.
Note
If the Mailing feature is enabled in the eLearning settings, it is possible to send mass mailings to people enrolled in a course via a
Contact Attendees button at the top left of the course form. The button is only
visible to eLearning Officers who also have User access rights for Email Marketing and to eLearning Managers.
Display
Training: The course content appears as a training program, and the courses must be
taken in the proposed order.
Documentation: The content is available in any order. Use the Featured
Content field to define which content items are promoted on the course homepage.
Karma tab
This tab is about gamification to make eLearning fun and interactive.
In the Rewards section, choose how many karma points you want to grant attendees
when they Review or Finish a course.
In the Access Rights section, define the karma points needed to Add Review,
Add Comment, or Vote on the course.
Course groups
Course Groups allow users to filter the All Courses dashboard on your website and
find the course that meets their interests, needs, level, etc.
To manage them, go to . Click
New to create a new course group. Add the Course Group Name, enable
Menu Entry to allow users to search by course group on the website, and add tags in
the Tag Name column. For each tag, you can select a corresponding color.
Settings
The following options are available in the eLearning settings. Go to , then enable the desired feature:
Certifications: Assess attendees’ knowledge and provide official certification of
their skills.
Paid Courses: Sell course access directly through your website and track revenue.
Note
Enabling Paid Courses automatically installs the eCommerce module,
which may impact your pricing plan.
Mailing: Send mass mailings to keep all attendees informed and up to date.
Forum: Build a community space where attendees can ask questions and help each other.
Content
To manage course content, go to . Click
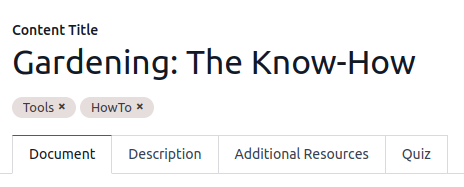
New to create a content item. Add the Content Title and any desired
Tags, then fill in the required information in the different tabs.
Tip
You can also create new content from within a course. Go to , click the relevant course card, then click Add content at the bottom
of the Content tab.
Document tab
For each content type, provide the following information:
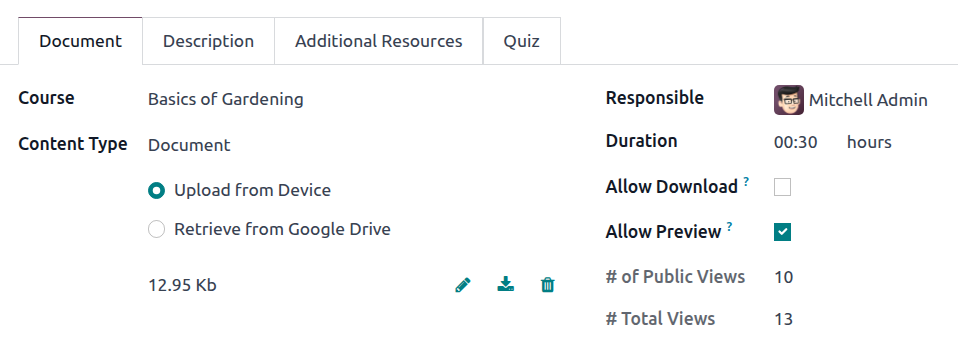
Course: Select the course to which the content item belongs.
Content Type: Select the relevant content type and
provide the required information.
Responsible: Select the user responsible for the content item. By default, this is the
user who creates the course, but another user can be selected.
Duration: Enter the time required to complete the lesson.
Allow Preview: Enable this if the content should be accessible to anyone.
Note
If the Content Type is Document, enabling
Allow Download allows users to download the content.
Two read-only fields provide data about how often the content item is viewed:
Content types
You can add the following content types:
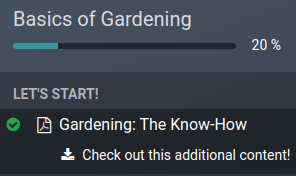
Image: To upload an image, select Upload from Device, click
Upload your file, then select the relevant file. Supported formats include JPG, JPEG,
PNG, SVG, GIF, and WEBP. The maximum file size is 25MB.
Alternatively, to add an image saved on Google Drive, select Retrieve from Google
Drive, then add the Google Drive link to the image.
Article: Articles are website pages that are customized using the website
builder on your website’s front end.
With the Course selected, click the Go to Website smart button, then, at
the top-right of the screen, click (Edit). Write the article’s
content and customize the page using the website builder.
Document: To upload a document, select Upload from Device, click
Upload your file, then select the relevant file. Only PDF documents can be uploaded.
Alternatively, to add a Google Slides presentation, Google Doc document, or Google Sheets
spreadsheet, click Retrieve from Google Drive and add the Google Drive link to the
file.
Video: Add the YouTube, Google Drive, or Vimeo link to the video.
Quiz: Open the Quiz tab to create a quiz.
Description tab
Add a description for the content. This text is displayed in the About section of the
content item on your website.
Additional Resources tab
Click Add a line to add a link or a file that supports your participants’ learning.
The resource appears in the course content on your website.
Quiz tab
From this tab, you can create a quiz to assess your students at the end of the course.
The Points Rewards section allows you to assign karma points based on how many attempts
are needed to answer correctly. To create a question, click Add a line, enter the
Question Name, and add possible answers. Mark the correct answer(s) by selecting
Is correct answer. You can also use the Comment field to provide additional
information when an answer is selected.
Content Tags
Content Tags are visible on the Contents dashboard of a course on your website, and
can help users identify the kind of content a particular lesson contains, e.g., theory, or exercises.
To manage content tags, go to . Click
New to create a new tag.
Publish courses and content
Courses and content items must be published from the front end to be available to your audience.
To access the front end, click the Go to Website smart button at the top of the course
form or an individual content form.
A course and its content items are published separately:
To publish a course, access the main course page, then toggle the switch in the
upper-right corner from Unpublished to Published.
To publish individual content items, click on an item to open it, then toggle the switch
from Unpublished to Published.
Tip
When publishing a new course, publish the individual content items before publishing the course
itself. Published content is only available to your audience once the course it is part of is
published.
To unpublish a course or an individual content item, open the course or item, then toggle the switch
from Published to Unpublished.
Note
Unpublishing a course renders the course and its content unavailable to your audience.
Adapted from the Odoo 19.0 User Documentation for DigitsCode customer support. © Odoo S.A. DigitsCode capabilities remain in the DigitsCode Capabilities category.